Showing posts with label diy. Show all posts

Saturday, 15 March 2014

Pamper your feet at home

Our feet are the most neglected parts of our body but they have to bear the weight of the whole body. We only understand how much our feet are tired when we lie on bed after a whole day of work.

Due to neglecting our feet most of us are not able to wear our favourite footwear. Here are some tips that will help your feet get some love from you.


1. Pamper your feet with just 10 minutes pedicure. Soak them in warm water which has some salt in it.this is the easiest way to give them some love.

2. Every night massage your toes with a foot cream. This will prevent you from getting cracked heels.

3. Use pumic stone as a scrubber for your feet. This is what I swear by. I use pumic stone every other day in my shower to remove dirt from my feet.

4. In mood of a luxurious feeling? Treat yourself with a milk soak by adding a cup of milk and rosewater in warm water. Follow it up by scrub and a moisturizer.


5. If your feet is tanned then give it a massage with baking powder mixed with lemon. This will surely keep tannin at bay.

6. I have used the warm water remedy- soak your feet in warm water at night, follow it up with a quick massage with vaseline and wear cotton socks and head over to bead. This has made my feet all the more beautiful.

7. If you have a moisturizer that is heavy for your face, use it for hands and feet.

8. Give them an oil massage once a week with coconut or almond oil.

9. Always wear comfortable footwear.

10. Dress your feet proudly with a shot of nailpaint. You will feel all the more confident.

Wednesday, 26 February 2014

Patanjali Aloevera Gel

Hello friends. I know you will kill me for coming up once again with patanjali but I just cant help it.. No No, they have not bribed me either. This time its their aloevera gel which is being reviewed.

Let me say that it is a must have in your stash. If you still dont have it, go and grab it now. I swearly swear by this product. Why? Read on..

1. My hands got burnt severely when I was cooking (okay I accept I am a bad cook) the first thing that I applied was this gel. OMG, that was an instant relief man. You must have it for emergencies.

2. It is a flip cap tube priced at rupees 75 for 150 ml. What else do we need?

3. Easy to carry and travel friendly.

4. Provides an instant cooling effect to skin. Love it.

5. When I apply it at night, I wake up with a bright smooth skin in the morning.

6. I use it as a massage cream for my homemade facials.

7. When I get my eyebrows threaded, I apply this gel instead of any astringent. Not only it cools but it also soothes my sensitive skin.

8. If I get any rash on my skin, this gel is my saviour.

9. I uuse this gel in everything, be it facepacks, hairpacks, manicure, pedicure and what not.

10. It feels sticky on my skin for first 5 minutes but after that it gets absorbed completely.

11. It contains 90% of aloevera gel. Not purely natural but you cant have it without any preservatives.

12. The gel has it own added colour which is not required.

13. It has got vitamin E. So there is added benefit also.


Go and grab this product immediately.


Saturday, 22 February 2014

Difference between a toner and an astringent

While searching in google I came through many writeups. Some say that rosewater can be used as a toner and some say rosewater can be used as an astringent. They even explain how to make rosewater toner or rosewater astringent. And bammm.. Both the preparations are the same.. so whats the basic difference between the two???

Astringents and toners are similar in the fact that they help absorb excess oil and make sure the
skin doesn’t look shiny. Still, they are a little different from each other.
The main difference lies between the two is that astringents have alcohol content in them while toners do not contain alcohol.. To know the basic difference between skin toner and astringents is to know hot to treat your skin properly.

Astringent helps tighten the pores, acting as a guard from bacteria or oil that could penetrate the pores and cause acne pimples. People with acne prone skin must use astringents but people with sensitive skin should atay away from it. Witch hazel is the best natural astringent. Dry skin should always stay away from toners.

Some toners, called fresheners, work similarly to astringents by tightening the skin, but they are
made of ingredients like caffeine and green tea instead of alcohol. Toners normally consist of moisturizers, oils and extracts that help soothe and hydrate your skin. So hydration is the main key that toners provide. Toners can be used even on sensitive skin because they are natural. These can be used by all skin types so they are a must have.

Both toners and astringents have the same purpose. They serve as a cleanser. Both men and women can use toners or astringents. Nowadays, there are already lots of toner or astringent products that are designated for men which mean that men are becoming more
conscious about their skin and to their whole appearance as well.


Wednesday, 19 February 2014

Top 10 homemade facial scrub recepies


1. Rice bran powder
It is gently exfoliating for smooth sooft skin. It prevents wrinkles, heals blemishes and absorbs dirt and oil from pores. Mix it with milk powder and you are done.

2. Citrus scrub
Mix some dried orange peel powder, some dried lemon peel powder, some almond powder and moisten it with water. Use it and rinse with warm water.

3.golden glow scrub
For that glow mix 2 tbsp orange juice with a pinch a coarsely ground turmeric and scrub your face with this mixture..

4. Walnut scrub
Mix 1 tbsp walnut powder with honey and lemon juice and scrub your face. It will give a healthy glow to your face.

5. Cocoa-coffee scrub
Mix some grounded coffee with some cocoa powder and honey and you have your magic scrub.

6. Olive oil and sugar scrub
Mix 1 tbsp of sugar with 1tbsp olive oil until it reaches a paste like consistency. Massage it gently. Wash off with lukewarm water.

7. Lemon sugar scrub
Mix 1 tbsp of powdered sugar with a drop of lemon juice and a drop of almond oil. This is best suited for oily skin.

8. Mango coconut scrub
Mix sugar in mango puree and coconut milk along with lemon juice. Not only it works but it will also give that exotic feeling.

9. Strawberry and yoghurt mash
This will eat away dead cells and will make the skin bright. Mash some strawberries in yoghurt and pat on your skin. Remove it with warm damp cloth.

10. Oats and honey scrub
Mix some grounded oatmeal with honey and apply. Remove with warm damp

Saturday, 15 February 2014

DIY rosewater and clove oil toner

I am back once again with a toner recepie. I follow my CTM routine and use rosewater from patanjali as my toner. It gives a nice glow to my face. But off late my skin started breaking out so I decided to give my toner a good makeover and thus came up with this idea.

This toner requires just two basic ingredients - rosewater and clove oil. You know clove oil has an amazing fragrance. It has its own properties to ignite senses. You feel good by its smell. It also helps in preventing breakouts. And rosewater as we all know is the toner of the universe.

Its smells of both roses and clove which is an instant mood enhancer. You have to try it to feel the smell but I can say its very refreshing. I have got a sensitive skin so I can say it will not harm sensitive beauties.

Preparation method- oh thats easy just pour rosewater in a spray bottle and put 2-3 drops of clove and you are done. Its that easy!

So go ahead and prepare your toner.

Thank you


Thursday, 13 February 2014

DIY rejuvinating face and body pack

Since my pampering sessions are on so the first thing that came to my mind is to make a rejuvinating face and body pack at home. This pack comprises of basic things like gramflour, turmeric honey etc but the effect of this pack is very long lasting. You see an immediate glow on your face and your skin turns smooth and glowing.

I can understand that it will make your bathroom a little messy but for me its okay.. Atleast I can enjoy my pampering at the comfort of my home.

Things required:
Gramflour(besan)
Turmeric
Honey
Almond oil
Rosewater

All you need to do is to mix all these ingredients and you need to make it in the form of a pack which is neither too runny nor too thick. You can add rosewater according to the desirablity factor but please check that it does not makes the pack very runny.

Benefits:

Gramflour is used as a skin lightening agent. It helps in reducing oiliness and makes skin fresh and bright. It also helps in reducing skin tan.

Turmeric helps in skin pigmentation and blemishes. It gives a nice youthful glow to the skin. It helps in removing dead cells and treating wrinkles.

Honey as we all know works as a smoothning and conditioning agent for the skin.

Almond oil also helps in skin brightening and reducing skin flackiness. It makes skin glowing and bright.

Rosewater is a staple thing used in every facepack which works as a toning agent.

You can even add lemon drops to this pack for more effectiveness.

So enjoy your pampering session at home.

Take care


Saturday, 1 February 2014

DIY cocoa-coffee lip balm

I think the title itself is so exciting that the post does not need any sort of introduction. We girls can never have enough lip balms. I mean we need them in every possible flavour, we need them in every possible colour. Lip balm is a staple thing in my stack. Well, I do not have lip balms in every flavour but I have started making mine in different flavour. I got this idea from pinterest and I thought lets share this idea with all of you.

For those who think DIYs are boring, effort-taking and time-consuming, here is a note to them- when you will first try a thing that you have preapared yourself, the feeling is all so different. You feel a little proud of yourself. You also know what you are using.

Okay, now enough of gyaan. Lets jump straight to the DIY. Let me tell you that this is not at all totally copied from pinterest, I have done my own moderations in it. I amjust inspired from that idea.

Things required
1.Vaseline
2.A mixture of cocoa powder and pinch of coffee powder.
3.Vanilla essence (optional)

Firstly you need to melt the vaseline, just heat it till it melts so that we can mix our cocoa-coffee powder in it. In the liquid stage only you need to add as much things as you can so you need to be a little fast here because vaseline solidifies faster.

You can even add vanilla essence for a yummy flavour. I have added it when I was heating it. And now just transfer it into an empty container or a cute lip balm pot which is empty. It solidifies in about 5 minutes and takes up a lovely dark brown shade. Dont worry the colour would not show up on lips.

This can be applied as a lip scrub also because you will find fine coffee particles which will scrub your lips very well. Overall I am in love with what I have made. You can even add a drop of almond oil to this lip balm for added benefits.
I apply this lip balm at night and wake up with soft smooth lips in the morning.

Enjoy the piccys


shikha

Friday, 31 January 2014

Get stripped DIY nail art tutorial.

I love stripes on my nails. They give a very very edgy look. I feel them to be very sexy. And they are easy to do. If you are used to drawing straight lines, then you can master this art.
This time I have created striped nail art with a difference. I have combined two coloured striped and whoaa a new nail art..

This can be done on any base except black and white. Because I am doing stripes in two colours that is black and white..

Step one paint your nails with a red colour nail paint..

Draw three stripes with a white nail art pen in the left hand side of the nail.

Then draw three stripes with a black nail art pen on the right side of the nail. Try and make them match on the upper part.

Now you are done. You will get edgy nails in minutes.

Thank you


shikha

Thursday, 30 January 2014

How to make tinted moisturizer at home

We all love some kind of sun protection for our face and we also love some kind of cream that helps in hiding our blemishes and provide some brightening effect. So my brain struck into an idea, why not lets combine a cream and a sunscreen and make your own version of a BB cream?

Sounds interesting! Oh yes it is interesting indeed. When I am in a hurry I forget to apply my sunscreen and later on I regret about it. So I thought to make my own tinted  moisturiser which is safe to use and contains less chemicals  as compared to other creams. It is very simple and easy to make and can be stored for a long period of time.

Actually the motivation behind the idea is the time factor and the money. We youngsters are always in hunt of good products at low prices. And I believe its best to protect our skin at this age as much as possible so that we can reap maximum benefits out of our skin at later stage. So I prefer using as much natural things as possible.

This tinted moisturiser I am talking about is very easy to make and combines some very basic ingredients which can be stored for a long time. But i prefer making smaller batches.

So lets jump straight to the DIY.

Ingredients
An empty container
Tinted loose powder, I am using lakme rose powder
Aloevera gel
Sunscreen

Thats it...

Firstly take some loose powder in an empty container. Make sure you sanitize your spoon to tranfer the powder.

Then take some aloevera gel in the container.

Finally take some sunscreen in it.

Now just mix all these and you are done.

You can even select your shade to make an even colour by taking more loose powder. It brightens my face and covers slight imperfections. It is good for daily use and contains benefits of aloevera and sunscreen.

You can even make a shimmer moisturizer by mixing some shimmer powder or liquid, I have used here Oriflame peach me perfect cream.

A final note, please make sure that you sanitize your hands before dipping your fingers in the container..

Thankkss..


shikha

Tuesday, 28 January 2014

Two minute makeup look tutorial

Makeup is something that i love doing. I mean any girl would not mind if something enhances her features.. My love for makeup has inspired me to start this blog. With so much passion in my heart i thought why not come up with a basic tutorial. This tutorial would help you out when you are in a hurry. I mean something is always better than nothing.
This tutorial requires some very very basic things. It just prepares your face in the morning. If you have a clean face without any imperfections you can very well go ahead with this look.
Requirement
A kajal
A lip gloss
A lip balm
A BB cream
A mascara
By now it must have been very clear to you that what I am talking about. People are actually confused of what to apply and what not to apply when they are in a hurry. So they tend to skip a few steps in their makeup.
Step 1
Wash your face with facewash and put toner.
Step 2
Applyy BB cream on your face.
Step 3
Apply kajal on your eyes. If you want you can line up your upper lid also. But here I am lining my lower lid
Step 4
Apply lip balm and then a lip gloss. The trick is to put focus on your  lips since the eyes are not done up so much. This would instanly bright up your face
Finally apply mascara and you are done.
Enjoy your look..
Thankks

Monday, 27 January 2014

How to keep yourself fresh while staying outdoors

This is a problem with probably all the persons out there. Since I have oily skin, my face becomes oily when I stay outdoors and thus it becomes dull and lifeless. Sun plays a very important role in causing harm to our skin. Tanning, pigmentation, loosing your glow are all because of staying out for a very long time. Staying fresh also becomes important so that you feel confident about yourself even if you have to catch up with your friends or a date maybe in the evening.


So here are few tips to keep you fresh even if you are staying outdoors for the entire day.

Before stepping out of your house apply sunscreen. And keep a small tube of sunscreen in your bag. This helps in providing some sun protection

Never leave your house without a bottle of water, if you know that you have to stay outdoors. This will ensure that your body is hydrated and also you will not feel thirsty

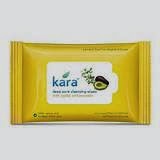
Keep a packet of wet wipes especially baby wipes because they do not have alcohol in them. Use them as often as you need. Wet wipes gives you a feeling of a clean and a pollution free face so you know that your face is not carrying any dust or oiliness.

Another thing on which I stress is keeping a small bottle of hand sanitizer in your bag. I prefer Himalaya pure hands sanitizer which is priced at Rs. 40 or so. It becomes a must to use a hand sanitizer before and after having your food so that your hands become germs free. 

Coming to the makeup part, I think to look fresh, a girl just requires just basic things- a kajal, a moisturizer, a lip balm. Also carry a comb with you so that your hair does not feel messed up. I know you must be thinking that the bag will become heavy but its not so, these are basic things that even a man should keep in his bag (apart from the makeup ofcourse) these are basic and very important things which most of us tend to skip but they are very important as a part of our hygiene and freshness.Also keep some candies and mint in your bag so that your mouth feels fresh and you become more confident.For girls, if you are oily skinned like me, you must also keep a compact powder so that your face feels bright and glowing.Wear comfortable and loose clothing and comfortable footwear so that you do not feel uncomfortable while walking or sitting and also you are able to carry yourself wellWhile staying outdoors don’t eat oily or fried food and also avoid cold drinks because it makes your face more oily and your body also feels weak. So as far as possible try and avoid these.Lastly try and smile as far as possible because you never know who is falling in love with your smile. I know I am overstressing on smiling but still its very important to be feel fresh, glowing and confident.


Thank you

Image sources google.com


shikha

Wednesday, 22 January 2014

DIY coffee cocoa mask for glowing skin

As you all know I am a big fan of DIYs. This time it’s a DIY with cocoa and coffee. And its equally tempting. We girls just love chocolate and when it becomes a part of our skincare, it gives an amazing heavenly feeling. My room gets filled with its amazing aroma. The entire winter, hot chocolate has been flowing in our blood and it’s high time that it flows through our skin too. This is a simple at home mask which gives a spa like feeling at the comfort of your home. I actually end up licking a part of this superb mask.
Okay so you all have become very excited by now. Read further to know more about this DIY.


Ingredients
Coffee- it is loaded with antioxidants which can prevent premature skin ageing. It helps in preventing the appearance of cellulite and also removes puffy eyes. It acts as a good exfoliator for dry skin and makes it silky and smooth.

Cocoa powder- it is very rich in antioxidants including vitamin E, helps to keep your skin supple, glowing and young. It has lots of minerals including calcium, potassium and zinc. This also helps in preventing cellulite.

Honey- who doesn’t knows the benefits of honey in skincare. It acts as a natural moisturizer and has antibacterial properties. It is also full of antioxidants which helps in clarification of pores and gives a healthy glow

I can see you all getting tempted to try this DIY. Trust me it gives a very healthy glow which lasts throughout the day and with regular use, it with make your skin smooth and glowing. Just massage your skin for 5 minutes and wash off with cold water and check out the difference yourself.

Firstly take some coffee powder in a bowl


Add cocoa powder


And finally add honey to make it in a consistency of a paste


It is indeed tempting and I bet you will end up licking it.


 You can also add almond oil for added benefits. Now you don’t have to rush to parlors for your face cleanups. You can get it done at the comfort of your home with easily available ingredients and it takes just 15 minutes of your time.
Do we need anything more??

Thursday, 16 January 2014

Almonds in skincare

The first thing that I have In the morning after water  is 5-6 almonds soaked overnight. They are even good option when you don’t have time for breakfast and you are in hurry, just grab handful of almonds and you will not get the feeling of empty stomach. Almonds have become a staple thing in households.

100% pure almond oil is loaded with essential vitamins like A,D and E. it does not have the greesy feeling like coconut oil nor does it has a strong smell like mustard oil. It feels light, non-greasy and smooth.


I have tried many many moisturizers in the past but none of them were effective in curing my dry and flakey skin during winters then the Patanjali almond oil landed at my kitty. One night I applied it on my face, next morning I woke up with a smooth, fair and nourished skin and now after using for 2 months, all I can say that I cannot live without my Patanjali almond oil. It is cheaper than its Hamdard counterpart but it delivers the exact results (or even better). It is priced at Rupees 100 for 60ml. I use it as a regular moisturizer but it makes my skintone a bit darker so I apply it at night only. The best part is being an oil, it did not break me out. I have noticed the growth of my eyebrows and eyelashes after using it. My skin feels a lot more smoother and brighter. I even use it as my hot oil massages and it has given me shiny hair.

How to use my almond oil
1. As a lip scrub my mixing honey, almond oil and sugar granules
2. As a hot oil treatment
3. As a night cream
4. When my nails need some moisturizer, I use it as a cuticle oil.
5. Since it does not feels greasy I appy it on my hands and feet.
6. It does not have any fragrance, so no problem for me.
7. Most of my hairpacks and facepacks have almond oil in them.
8. In winters I use it as an afterbath body oil.
9. It has reduced my dandruff to a lot of extent.
10.Most importantly, I use it as a makeup remover, it removes my makeup very effectively.

The only thing that I dislike about Patanjali almond oil is that it comes in a plastic bottle without any nozzle, there are high chances of product spillage. So as soon as my Johnson’s baby oil got over, I transferred the almond oil into that bottle. Nad now I can use it very well. I have even transferred the extra oil into a Clean n Clear face wash bottle (the travel pack one priced at Rupees 15) so this prevents my product from getting waste.


They say that the oil prevents dark circles and it is good in anti-ageing, but I cannot comment on that aspect now.
The bottle reads as follows
 1.Relieves mental tension
2.Strengthens brain power
3.Good for heart
4.Relieves constipation
5.Fights dandruff
6.Keeps body warm in winters
7.Nourishes skin
8.Good for infants

So many benefits in one bottle. If you get your eyes on this bottle, just grab it.
So how do you use almond oil?


Tangy Orangey DIY

Here goes my first do it yourself post on the blog. We all love this tangy fruit in winters. Every morning I have a glass of orange juice. This fruit provides vitamin c, reduces inflammation and promotes skin condition. Vitamin c is the key ingredient for production of collagen and hemoglobin.
Apart from health benefits, it holds a good position in skincare regimen. It can be used in many ways.


1.Orange juice along with a pinch of turmeric when applied on face gives an excellent party like glow on face.
2.Orange peel when rubbed on skin before bathing makes skin smooth and soft
3.A quick massage on face with orange juice brightens up the face.
4.Make a lip scrub at home by mixing sugar granules with orange juice and honey.
5.Orange juice can be applied on hair for that extra shine.
6.Dip orange peel in raw milk and you can use it as a scrub.
7.Add orange juice in bath water for a refreshing bath or in manicures and pedicures for added benefit.


I make a batch of dried orange peel powder at home which I use it for my facials and body masks.

Here I share a quick DIY for a mini facial at home.
Things required
1.orange peel powder
2.honey
3.rosewater


Firstly add honey to the powder.


Then add rosewater according to the desired consistency


This provides mild scrubbing to the face along with benefits of a facemask. Just keep massaging your face for 10 minutes with this pack and wash off with normal water. You will get a glow on your face along with skin brightening.


You can also make a body mask at home for body polishing by adding gram flour and aloevera gel and massage your body with this pack. Use of gram flour in pack will make the skin smooth. Aloevera gel helps prevent tanning, honey provides moisture to skin and keeps it smooth, rosewater has toning properties and it’s a powerful mood enhancer. You can even make a coffee-orange face pack by adding coffee into it. Ah! Heavenly smell. There is no end to innovation, the more you think the more ideas will pop up. More experiments can my done by adding almond oil for nourishment. You can add anything good in these packs for extra benefits.

The best thing about DIYs is that they bring out the real creativity in you without burning a hole in your pocket. You know that you are not causing any harm to your skin. And your skin will thank you back for this. It does not consume much of time and shows quick and long term results.


thank you...